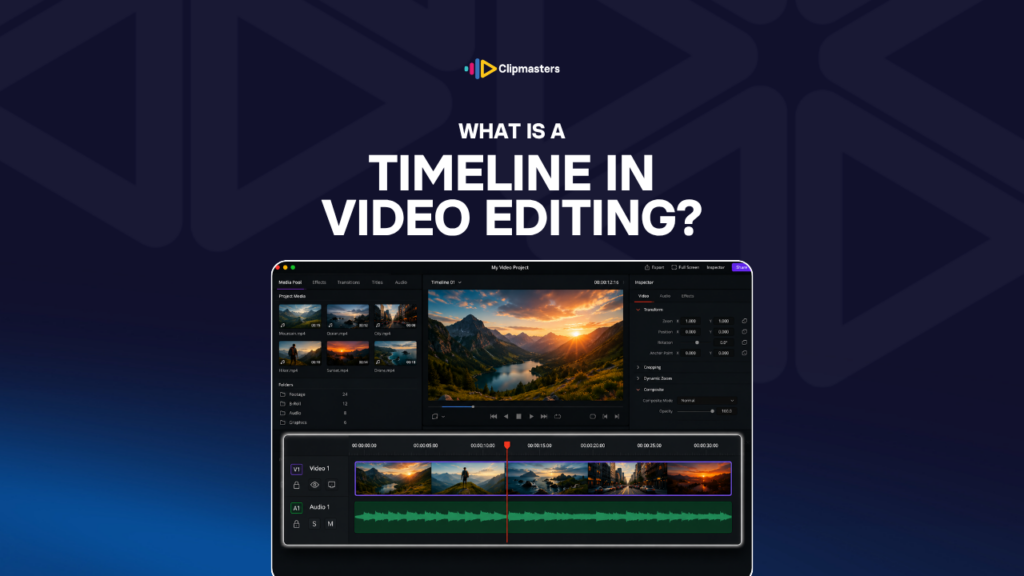
Open any modern editing program, Premiere Pro, Final Cut Pro, DaVinci Resolve, Avid, CapCut, or any of the others, and the timeline is the main thing you work in. It is a long horizontal strip where the editor lays clips out from left to right, in the order they will play.
The timeline is the editor’s workbench. Everything in the finished video lives on it somewhere. Video clips, audio tracks, music, sound effects, graphics, titles, transitions. Each piece sits at a specific spot, on a specific track, at a specific moment in time.
Here are the basic parts of a timeline:
For most editors, the timeline is where they spend the bulk of their hours. Knowing it well, the shortcuts, the way clips snap, the markers, the multi-track setups, is one of the core skills of editing.
The logic of a timeline is simple: time runs left to right, and content stacks vertically.
Time runs left to right. The far left is the start, time zero. The far right is the end of the video. The playhead moves left to right as the video plays.
Tracks stack up. Video tracks on top, audio tracks on the bottom. With video, the higher track sits in front of the lower one, so V2 covers V1. With audio, all the tracks play at once and mix together.
Each clip fills a time range. Every clip has a start point and an end point, and the gap between them is its length. Trimming a clip changes its length. Moving a clip changes its position.
Cuts happen where clips meet. The point where one clip ends and the next begins is a cut. By default the change is instant, but you can soften it with a transition like a fade or dissolve.
Audio and video can be joined or split. When you film, the picture and its sound come linked together. The editor can unlink them to work on each one on its own, like keeping the picture but swapping the sound for music.
The timeline does not touch your originals. The clips on the timeline are just references to your source files, not copies. Trimming or tweaking a clip never changes the original footage. It only changes how the timeline reads from it, so your raw files stay safe.
Export reads the timeline. When the project is done, the editor exports the timeline as a single video file. The export plays through left to right, combines all the layers, applies all the effects, and produces the finished file.
For day-to-day editing, almost every decision happens on the timeline. The other parts of the software, the project bin, the source monitor, the inspector, all feed into it. And the export reads straight from it.
A few features show up in nearly every modern timeline.
Multi-track editing. Several video tracks for layering images, and several audio tracks for keeping dialogue, music, sound effects, and ambient sound apart. A typical project might use about three video tracks and four audio tracks.
Snapping. The playhead and clips snap to useful points like cuts, markers, frame edges, or beats in the music. This makes lining things up far easier than nudging by hand.
Zoom. You can zoom in to see frame-by-frame detail, or zoom out to see the whole project at once. Editors zoom in for precise cuts and zoom out to check the overall shape.
Markers and labels. Coloured flags dropped on the timeline. Useful for review notes, sync points, marking sections, or anything you need to remember about a moment.
Audio waveforms. A visual picture of the sound on each clip. It lets the editor see the loud and quiet parts without having to play it back.
Source and timeline monitors. Two preview windows. The source monitor shows a clip you are getting ready, and the timeline monitor shows the assembled cut. The source window lets you preview, trim, and pick the part you want before placing it.
Trimming tools. Tools for adjusting where a clip starts and stops. Common ones are Ripple (trim and close the gap), Roll (lengthen one clip while shortening its neighbour), and Slip (shift the content inside a clip without moving the clip itself).
Transitions. Fades, dissolves, and wipes between two clips. They get applied right at the edit point.
Speed changes. Slow a clip down or speed it up. Used for slow motion, time-lapse, and pacing tweaks.
Colour-coding. Different clip types or scenes can be given different colours to keep a busy timeline organised.
The exact look changes from one program to the next, but the core ideas stay remarkably similar. An editor who learns one timeline usually picks up the others within a few projects.
Most editing software shares the same timeline ideas, but the details differ from program to program.
Adobe Premiere Pro. A multi-track timeline with separate video and audio sections. Very customisable, with a shortcut for nearly every action. It is the go-to for many professional editors.
DaVinci Resolve. A multi-track timeline with deep colour and audio tools built in. The free version covers most of what you need, and the paid Studio version adds the advanced features. It has grown popular as a Premiere alternative.
Final Cut Pro. A different approach called the “magnetic timeline,” which drops traditional tracks. Clips snap to each other and stack on their own based on content. Editors are split on it: some love it, others prefer classic track-based timelines.
Avid Media Composer. A traditional multi-track timeline with strong trimming controls. It is the standard in feature film and TV editing, with a steeper learning curve than Premiere or Resolve.
CapCut. A simpler, mobile-friendly timeline. Fewer tracks, more automation, and built for fast short-form social content. It has taken off with creators who want less complexity.
Descript. A text-first editor where the transcript is the timeline. Edit the words and you edit the video underneath. It is an unusual approach but increasingly popular for podcasts and interviews.
iMovie and Filmora. Friendly, consumer-level timelines. They have fewer features than the professional tools, but they are easy enough for casual creators.
For commercial and online video work, Premiere Pro, DaVinci Resolve, and Final Cut Pro lead the professional market. Each has its strengths, and the skill of working a timeline well carries over from one to the next with a bit of practice.
The timeline is where a video actually gets built, and a good editor’s comfort with it is what makes the work fast and clean. At Clipmasters, your editor lives in their timeline, so the shortcuts, the trimming, the multi-track layering all happen quickly behind the scenes. That speed is part of how a simple edit can come back to you in as little as 24 hours without feeling rushed.
A track is a horizontal layer on the timeline. Video tracks (usually labelled V1, V2, V3) stack on top of each other, and the higher ones sit in front of the lower ones. Audio tracks (A1, A2, A3) all play at once and mix together in the final output. Most software supports several video and audio tracks for layering images and building up the sound.
Cutting adds a new edit point in a clip, splitting it into two separate clips. Trimming adjusts where an existing clip starts or stops, making it shorter or longer without splitting it. Both are basic editing moves, and most software gives you a separate tool for each.
A ripple edit removes or adds time to a clip and then closes or opens the gap automatically by shifting everything after it on the same track. Without ripple, trimming a clip leaves an empty gap behind. With ripple, the timeline closes up on its own. It is the standard trim mode for most editing work.
Yes, in most professional software. A single project can hold several timelines, sometimes called sequences in Premiere, projects in Final Cut, or compositions in other tools. Each one is its own arrangement of clips. Editors often use separate timelines for different deliverables, like a 16:9 version, a 9:16 version, a 1:1 version, or separate language versions, all in the same project file.
A nested timeline (also called a nested sequence or compound clip) is a timeline placed inside another timeline as a single clip. The editor builds a section, like a complex graphics treatment or effect chain, then drops it into the main timeline as one block. Any change to the nested timeline carries through to everywhere it is used. It is a handy way to manage complex projects without crowding the main timeline.