J-Cut

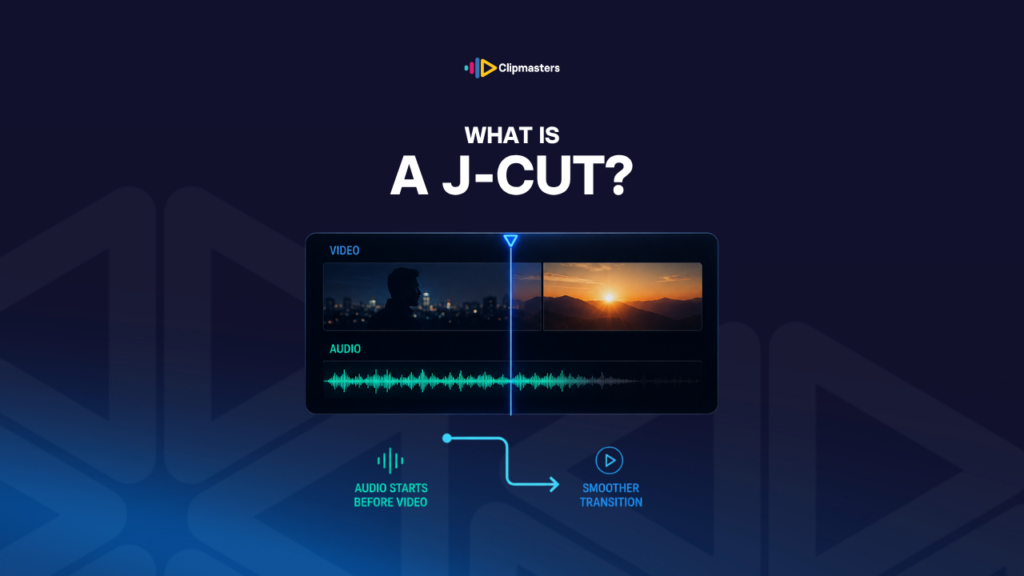
A J-cut starts the next shot’s audio before the picture cuts to it, so you hear the new sound before you see it.

In this article

Related Terms

Start Video editing now

What is a J-Cut?

A J-cut is an editing trick where the sound leads the picture. The audio from the next shot starts playing before the picture cuts to it. You hear the new sound, maybe dialogue, music, or a new place, while you are still looking at the old shot. A moment later, the picture catches up to the sound.

The name comes from the shape it makes on the timeline. The audio of the next clip stretches earlier than its video, so if you picture the two tracks together (video on top, audio reaching down and to the left) it looks like a J.

A J-cut is the opposite of an L-cut. In an L-cut, the sound of the previous shot keeps playing into the next picture. In a J-cut, the sound of the next shot starts before the old picture ends.

Both do the same job: they smooth the move between two shots so the cut feels less abrupt.

A few common ways editors use them:

  • Dialogue scenes. Character A is talking, and you hear character B starting their reply under the last moment of A’s shot, then the picture cuts to B.
  • Location changes. The sound of a new place, like street noise or music in a club, plays under the last shot of the old place. Then the picture reveals the new location.
  • Setting up a scene. You hear someone speaking off-screen first, then the picture cuts a beat later to show who it is.
  • Shifts in mood. The sound of a quiet scene gives way to a tense one before the picture changes.
  • Voice-over and narration. Common in documentary. The narrator’s voice starts before the picture cuts to a new sequence.

J-cuts work because our brains take in sound faster than picture. Hearing something makes us expect to see it. When the picture shows up a moment later, the transition feels smooth instead of jarring.

Need editors who handle audio transitions with care?

Editors matched to your brand. Turnaround in as little as 24 hours.

Why J-cuts work

The reason a J-cut feels smoother than a plain hard cut comes down to how people take in information.

Sound grabs our attention. When we hear a new sound, our attention turns toward where it came from. By the time the picture shows up, we are already paying attention. The cut feels expected, not abrupt.

Sound sets up the story. In real life, we often hear something before we see it. Someone talking in the next room. Music coming down the street. A car approaching. J-cuts copy that natural order of hearing first, then seeing.

Smoother dialogue rhythm. In real conversation, people overlap. One person starts talking before the other finishes, they cross over briefly, and the talk moves on. Hard cuts on dialogue can feel like robots taking turns. J-cuts bring back that natural overlap.

They build a little anticipation. The audience hears something new and wonders what it is. The picture a moment later answers the question. That tiny gap creates a flicker of curiosity that keeps people watching.

They smooth choppy edits. A talking-head video that cuts between speakers with hard audio cuts can feel rough. J-cuts smooth those joins, so the conversation feels natural.

For interview-driven content, like documentary, video podcasts, and talking-head explainers, J-cuts are one of the handiest tools an editor has. They make cutting between speakers feel like a real conversation instead of a string of separate statements.

For dialogue in scripted film, J-cuts are almost everywhere. Just about every modern film and TV show leans on J-cuts and L-cuts constantly when editing dialogue.

How to make a J-cut in editing software

J-cuts are easy to make in any modern editing program. Here is the basic process:

  1. Put the two clips on the timeline. Clip A, then clip B right after it.
  2. Unlink the audio from the video on clip B. Most software has a keyboard shortcut to detach the sound from its picture.
  3. Slide clip B’s audio earlier on the timeline. Now the sound starts before the picture.
  4. Listen and adjust. Clip B’s sound should usually start somewhere in the last second or two of clip A. The exact timing depends on the moment.
  5. Add a short fade-in if you want. A quick fade on B’s audio, just a few frames, makes the entry softer. Sometimes that beats a hard audio start.

On the timeline it looks like this:

  • The video track shows clip A ending right where clip B’s video starts.
  • The audio track shows clip B’s sound starting earlier than the picture cut.
  • Trace clip B’s outline and the two tracks together form a J shape.

The opposite, an L-cut, means stretching clip A’s audio past the picture cut and into clip B. The steps are the same, just in the other direction.

In most software, the shortcuts make J-cuts and L-cuts very quick to do. Premiere Pro, Final Cut Pro, DaVinci Resolve, Avid, and most others all support this with a detach-audio command. Editors who do a lot of dialogue work build instinctive habits around these cuts.

On a project with lots of talking-head moments, like interviews, podcasts, or documentary, an editor will often go back through the rough cut a second time just to add J-cuts and L-cuts to every dialogue join. The result feels noticeably smoother than cuts without them.

J-cuts in different production contexts

J-cuts turn up in nearly every kind of video.

Feature film and TV drama. Almost universal in dialogue editing. Most professional dialogue scenes use J-cuts and L-cuts on nearly every shot change, and the audience never notices because it all feels natural.

Commercials. Common in any spot with dialogue. Even short commercials use J-cuts between speakers, or between an off-screen voice and the thing it is describing.

Documentary. A standard tool for interview editing. Cutting between subjects, between archival footage, or between narration and footage almost always uses J-cuts and L-cuts.

YouTube long-form. Talking-head creators who edit themselves often use J-cuts by instinct without ever naming them. The host’s voice carries across a cut to B-roll or a new angle.

Video podcasts. Once a podcast has video, J-cuts between speakers become essential. Without them, the visual rhythm feels much choppier than the audio.

News and broadcast. Standard practice. News editors use J-cuts constantly when cutting between reporter, footage, and interview subjects.

Social short-form. Less common, because the cuts are usually too fast for the trick to matter. A 30-second TikTok with a cut every two seconds has no room for sound to lead the picture by a beat. J-cuts work best when there is space to breathe.

Tutorials and explainers. Useful for cutting from an on-camera presenter to a screen recording or B-roll. The voice keeps going while the picture changes.

For most professional dialogue-driven content, J-cuts and L-cuts are baseline tools editors use without much thought. The real skill is applying them consistently across a whole video, not just on some cuts.

How Clipmasters Uses This

J-cuts are a small touch that has an outsized effect on how a video feels. Most viewers never consciously notice them, but they can feel the difference between dialogue that flows and dialogue that clunks from one speaker to the next. At Clipmasters, your editor treats J-cuts and L-cuts as the default for dialogue work, so the conversation in your video feels natural without you ever having to ask for it.

Frequently asked questions

What's the difference between a J-cut and an L-cut?

A J-cut has the audio of the next shot starting before the picture cuts. An L-cut has the audio of the previous shot continuing into the next picture. Both smooth the move between shots. J-cuts let you hear the new audio first, while L-cuts let you see the new picture first while still hearing the old audio.

Why is it called a "J-cut"?

The name comes from how it looks on the timeline. When the next clip's audio reaches earlier than its video, the outline of the clip (video on top, audio below stretching to the left) forms a J shape. L-cuts get their name the same way: the previous clip's audio stretches to the right of the picture cut, forming an L.

When should I use a J-cut?

For most dialogue transitions, J-cuts and L-cuts feel smoother than hard cuts on every join. They copy natural conversation, where speakers overlap and sound leads the eye. They are great in interviews, talking-head video, dialogue scenes, and anywhere two speakers cut back and forth.

How long should the audio overlap in a J-cut?

Usually about half a second to two seconds. Short enough that the viewer does not consciously notice the offset, but long enough to smooth the join. The right length depends on the rhythm of the dialogue. For overlapping speakers, a longer overlap feels natural. For a voice-over carrying into a new scene, a shorter overlap works better.

Do J-cuts work in all editing software?

Yes. The trick just needs you to detach the audio from the video and shift it on its own, which every modern editing program supports. Premiere Pro, Final Cut Pro, DaVinci Resolve, Avid Media Composer, and most other tools have shortcuts for the detach-and-shift workflow. The technique itself works the same no matter which software you use.

Loading video…