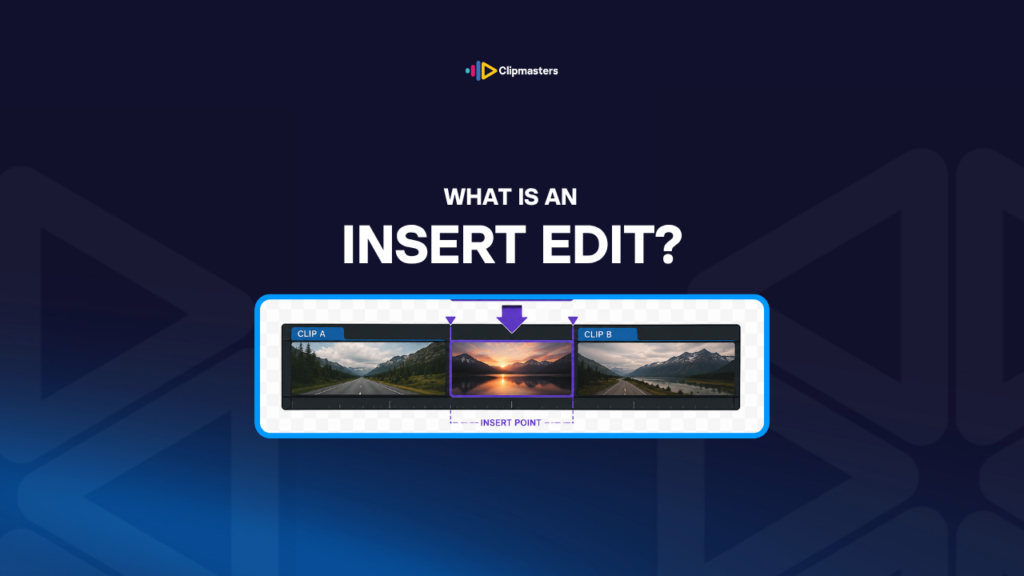
An insert edit adds new material into your timeline at a chosen spot. The clips that were after that spot slide later to make room. Nothing gets covered over. The existing material stays, just pushed forward in time.
There are two main ways to add a clip to a timeline:
Each one is for a different job:
Most software offers both, through tools, modes, or shortcuts. Which one is the default depends on the software.
In a typical workflow:
Insert is related to ripple behavior. Both involve clips shifting to keep things tight. The difference is that ripple is a whole category of edit behavior, while insert is one specific edit for adding clips.
For most paid work, insert is one of the standard timeline moves. Editors switch between insert and overwrite based on what they are trying to do.
Here are a few clear reasons insert edits are part of standard editing.
Adding content without losing anything. When new clips need to enter the timeline without covering what is already there, insert is the right choice.
Building from your selects. When you build a sequence from chosen clips, you usually use insert. Each new clip joins the timeline, and the earlier clips stay where they are.
Three-point editing. The classic three-point edit, where you set two points in the source and one in the timeline, uses insert by default. The marked section drops in at the marked spot, and the existing clips shift.
Adding B-roll over A-roll. Adding B-roll while keeping the dialogue underneath uses insert on the B-roll track. The A-roll, often on a higher track, stays put, and the B-roll slots into space on its own track.
Revising without disturbing your work. Adding new material to an edit without messing up the existing cuts needs insert. The new content joins in, and the rest carries on at later spots.
Common in story editing. Film and TV editing use insert often. New shots, alternate takes, and added coverage all get inserted into the existing edit.
It works alongside overwrite. Insert is one tool and overwrite is another. Editors choose based on the goal. Both are essential.
It changes the total length. Each insert adds to the timeline length. Sometimes that is fine, and sometimes it is a problem. For projects with a set length, inserts need to be balanced with cuts or trims.
It protects your existing edits. The cuts you already made stay as they were. New material joins in without disturbing them, unless you insert in the middle of a clip.
It supports safe, reversible work. Insert, with ripple delete to undo it, supports editing where you can always rebuild the original timeline.
For paid work, insert edits are part of everyday editing. The move is essential for building sequences, adding changes, and folding in new content.
Here is how insert edits work in practice.
Mark the start and end in the source. In the source monitor, mark the start and end of the section you want to insert.
Position the playhead. Move the timeline playhead to the spot where the insert should go.
Do the insert. Use the insert command. In Premiere Pro it is the comma key or the Insert button, in Final Cut Pro it is the W key, and in DaVinci Resolve it is F9 or the insert button. The exact shortcut varies by software.
Check the result. The clip should land at the playhead, and the later clips should have shifted back by the new clip’s length.
Use drag and drop with modifiers. Most software lets you drag clips with a modifier key to choose insert behavior. The default, insert or overwrite, varies by software, and the modifier flips it.
Choose your tracks carefully. Insert may affect one track or several. Some software pushes the later clips on every track, and others only push them on the insertion track. Check what yours does.
Watch for sync breaks. Inserting on one track without moving the linked tracks, like audio with video, can break the sync. Linked or grouped tracks usually ripple together.
Use insert for added content. When you add new content during a revision, insert keeps the existing edit intact. The new content takes its spot without disturbing earlier work.
Combine with trim. After an insert, fine-tuning often means trimming, whether refining the inserted clip’s start and end or the clips next to it.
Use markers for exact spots. Markers can guide where an insert goes. Inserting at a marker gives you frame-perfect placement.
Test the rhythm. Inserts change the timing of everything after the insertion point. Playing through the affected sections makes sure the new pacing works.
For most paid work, insert edits happen through standard shortcuts. Once you are comfortable with your software’s shortcuts, the move is quick.
Here are a few habits that cause insert trouble.
Mixing up insert and overwrite. Using one when you meant the other. Either you cover over content you wanted to keep (overwrite by mistake), or the timeline grows when you did not want it to (insert by mistake).
Sync breaks across tracks. Inserting on one track without moving the linked tracks. The video and audio drift apart. The fix is making sure linked tracks ripple together.
The timeline growing by surprise. Several inserts with no eye on the total length. For projects with a set length, the timeline grows more than you expected.
Inserting in the wrong spot. The playhead not where you meant it when you insert. The clip lands somewhere off. Check the playhead before you insert.
The wrong source clip. Inserting the wrong clip from the source monitor. The clip you meant was not loaded, or the start and end points were off. Check the source first.
Forgetting locked tracks. Locked tracks usually do not move during an insert. If a track that should move is locked, it stays put while the others shift. Unlock it first, or confirm the behavior.
Inserting in a music-synced section. Dropping a clip into a music-synced part breaks the sync. The music keeps its pace while the visuals shift. In synced sections, replace instead of insert.
Skipping the playback check. Inserting without testing. The result may not be what you expected. Play through after each big insert.
Confusing insert and paste. Some paste actions overwrite and others insert, depending on the settings. Check which behavior is active.
Not undoing a bad insert. A surprising insert that does not get undone. The editor tries to patch it forward instead of stepping back. Undo is usually cleaner.
Insert settings off. Some software has preferences that change how insert behaves. The wrong settings give odd results. Check the preferences if the behavior seems off.
For paid work, careful insert habits are part of editing well. Editors who use insert on purpose get predictable timelines. Editors who use it carelessly get inconsistent results.
Insert edits are simple in idea but ripple through the whole timeline, so it pays to use them on purpose. At Clipmasters, your dedicated editor chooses insert or overwrite deliberately for each change, which keeps your timeline predictable and your sync clean. The work is handled as part of the edit, with simple jobs coming back in as little as 24 hours.
Insert adds the new clip and pushes the existing clips later, so the timeline grows by the new clip's length. Overwrite replaces the existing clips in the same spot, so the timeline length stays the same. Both add new content. They differ in what happens to what was already there. Choose based on whether you want to keep it or replace it.
Mark the start and end points in the source monitor. Move the timeline playhead to where you want the clip. Press the comma key, the standard insert shortcut, or click the Insert button. The clip lands at the playhead, and the later clips shift back by the clip's length.
It depends on the software. Some software shifts the later clips on every track, which is a true ripple insert. Other software only shifts clips on the insertion track. Premiere Pro's insert shifts clips on the tracks you have targeted. Defaults differ from program to program, so check yours.
Yes, like any safe editing move. Press undo to reverse the insert. The later clips slide back to where they were, and the new clip leaves the timeline, though it stays in your source media. Insert edits are fully reversible.
In most modern software, "insert" is already a ripple move, meaning the later clips shift. The difference is sometimes between "insert at the playhead" for the current frame and "insert with sync" for specific behavior on linked tracks. Check your software's docs for exactly how its insert tools behave.