


Are you looking for ways to elevate your Instagram game by learning how to craft captivating Reels using multiple photos, and in turn, significantly boost your online presence and business growth?
Whether you’re an online entrepreneur or a content creator, mastering the art of creating Reels with multiple photos can be a game-changer in scaling your business and enhancing your online presence.
In this post, straightforward techniques for making your Instagram Reels stand out, ensuring you make a splash in the Instagram world.
2 Best Ways to Create Instagram Reels with Photos
Creating engaging Instagram Reels with photos is an excellent strategy to boost your social media presence.
There are two main methods to achieve this: the manual technique and the use of pre-made Instagram templates. Each method has its unique advantages and can be used effectively depending on your specific needs and creative preferences.
Manual Technique to Make Reels with Photos
The manual technique offers full control over the creation process. This allows you to personalize every aspect of your Reel.
Before diving into the editing process, organizing your photos is beneficial. Start by creating a dedicated album on your phone with all the images you plan to use. This can save significant time and hassle, especially when creating a Reel that narrates a story over time.
Here’s a step-by-step guide to help you navigate through the process of manually creating reels on Instagram with multiple photos:
-
Accessing the Instagram Reels Feature
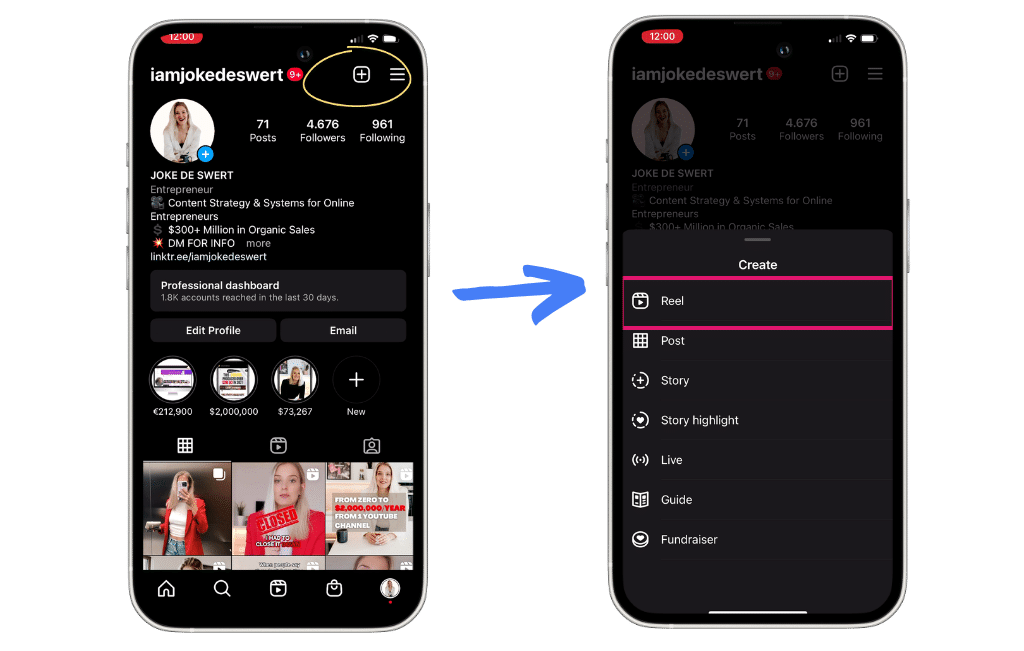
Begin by opening the Instagram app and tapping the plus icon (+) located at the bottom of your screen. Choose the Reel option to start creating your reel. -
Selecting Your Photos
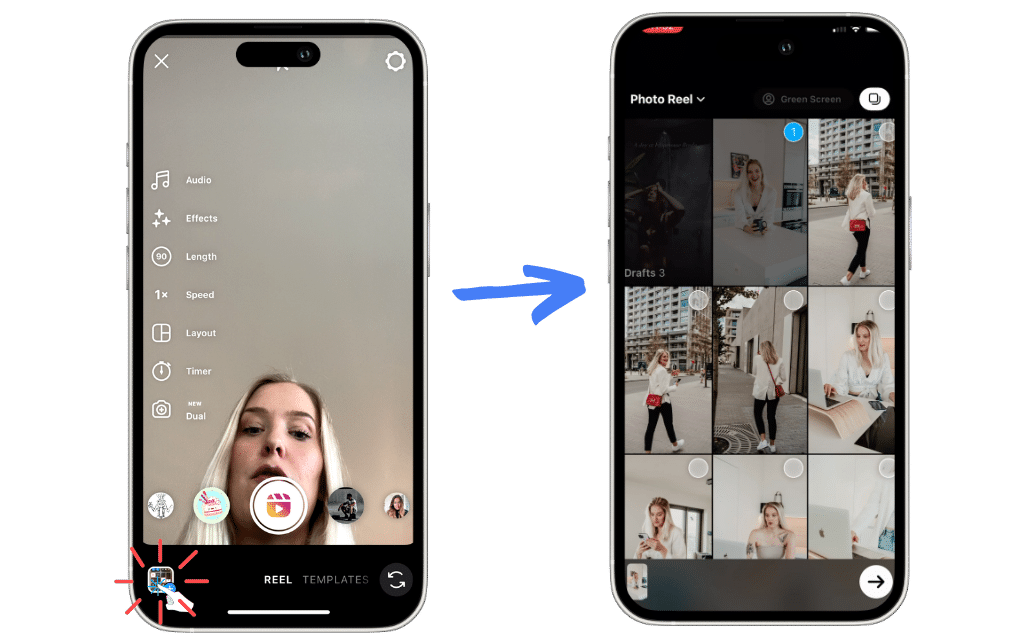
Switch to your photo albums within the app and find the album where you’ve stored the photos you want to use for your Reel.Select the images you wish to include. You can select up to 10 photos at once. You’ll want to select all the photos you want to use, so you don’t have to add each one individually.
-
Adding Music
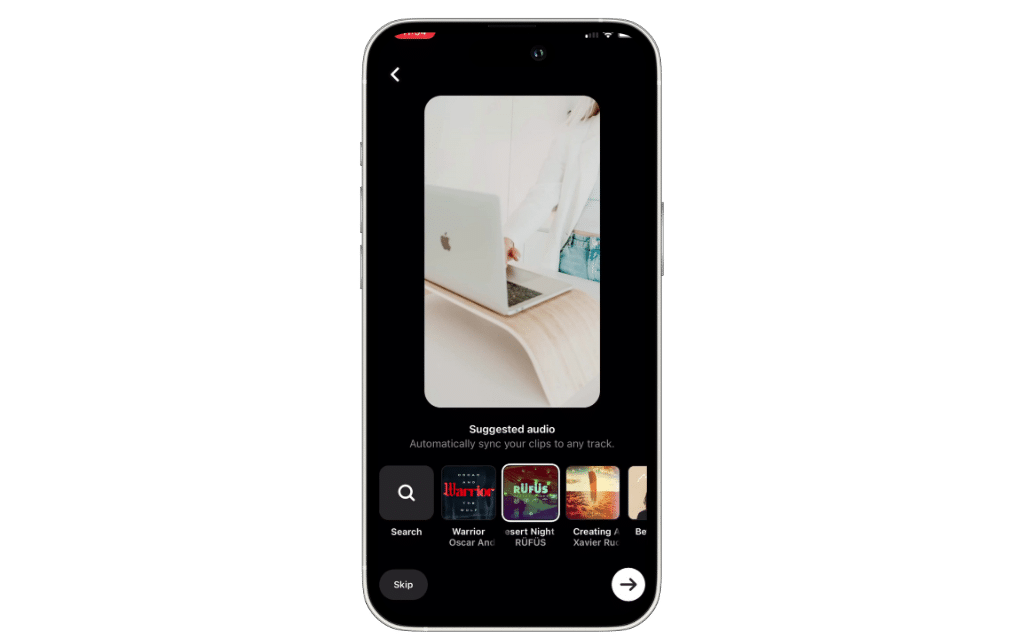
Once your photos are selected, Instagram will prompt you to add audio. You can search for a specific track or choose from your saved audio. Select a song that suits the mood of your Reel, such as something upbeat or a track like “Warrior” by Oscar and the Wolf.Instagram automatically syncs your photos to the beat of the audio.
-
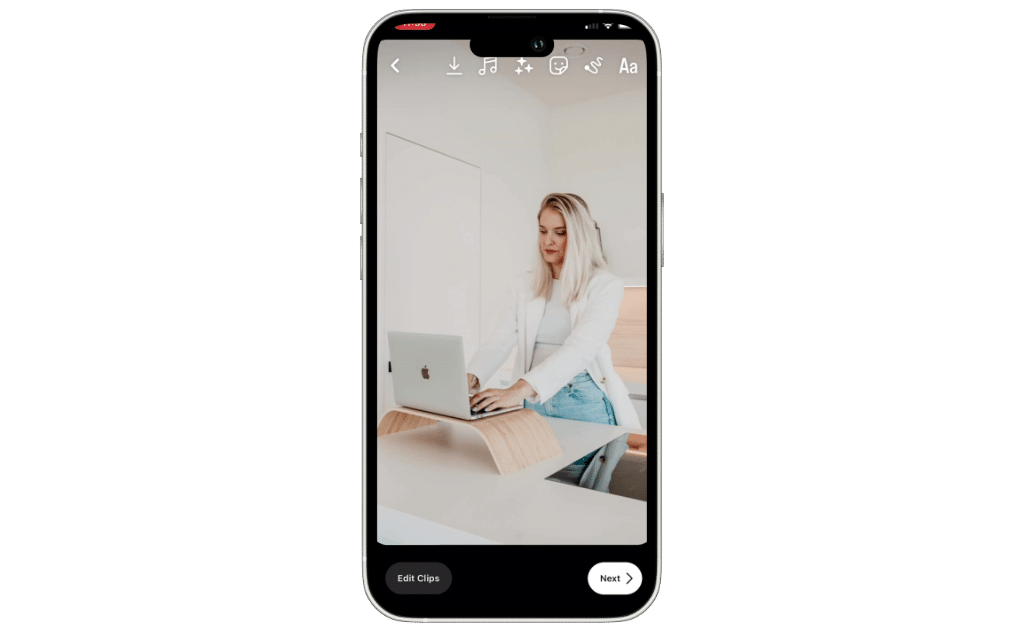
Editing Your Reel
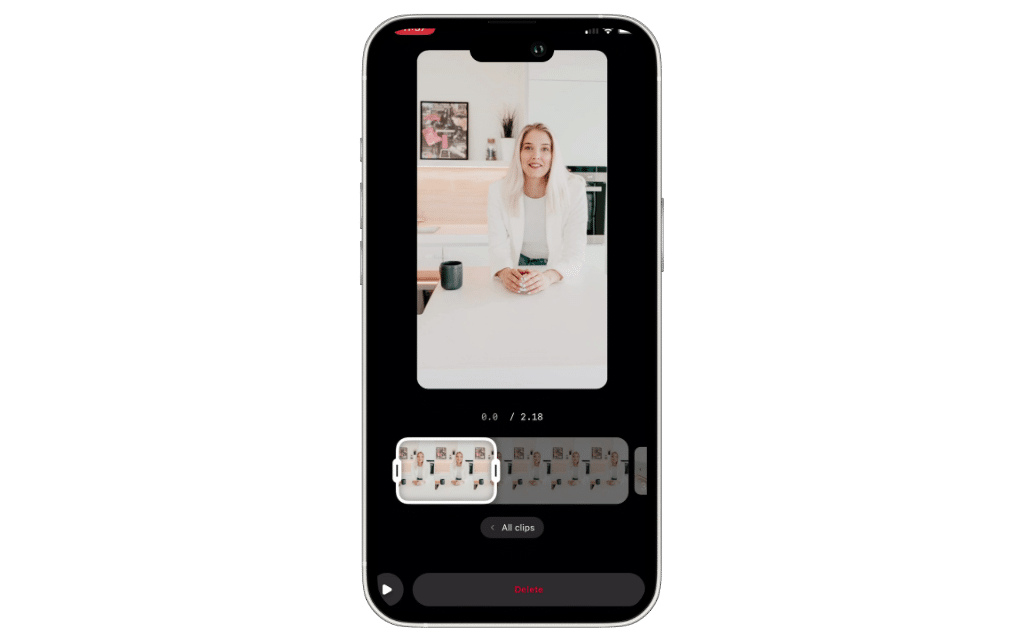
After adding music, you can edit your clips by clicking Edit Clips at the bottom of the screen. You can adjust the length of each photo clip, making them shorter or longer by dragging the edges of the photo.
You can also reorder your photos to ensure they appear in the desired sequence. Be mindful that reordering might require you to resync the photos with the music. If necessary, delete any photo by tapping the minus icon on the clip and confirming the deletion.
-
Adding Transitions and Effects
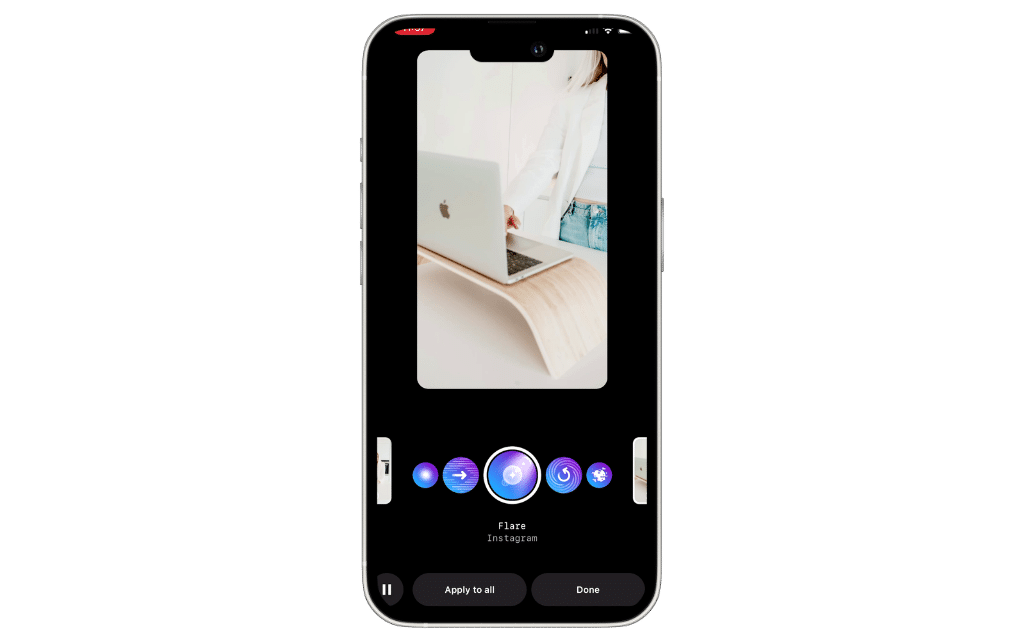
Enhance the visual appeal by adding transitions between your photos. Click on the Transition option to view different effects like zoom, blur, warp, flare, spin, or glitch.Choose the transition that best suits your Reel, applying the same transition to all photos or customizing each transition separately.
-
Finalizing Your Reel
Review your Reel once you are satisfied with the arrangement and transitions. Customize it further by adding text, stickers, or drawing on the clips. After making all the desired edits, click Done to finalize your Reel. -
Sharing Your Reel
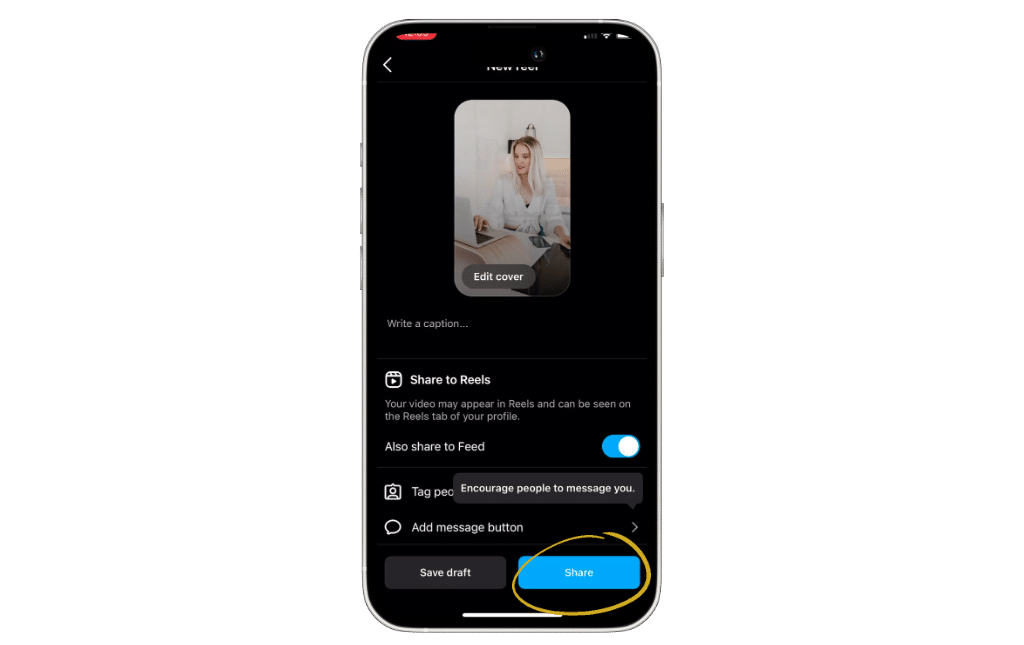
Add captions, and hashtags, and decide where you want to share your Reel, like on your feed or stories. Finally, share your Reel with your followers and on your profile.
By following these steps, you can create personalized and engaging Reels that reflect your style and storytelling. The more you experiment with different features and styles, the more proficient you’ll become at creating standout Instagram Reels.
Create Instagram Reels Using Instagram Templates
For a quicker and more straightforward method, Instagram templates are an excellent choice. These templates are pre-designed by Instagram or other creators on the platform, offering various styles and music synchronization options.
You can access these templates in two ways: through the Reels editor or by saving templates you come across while browsing the Reels feed.
-
Accessing Templates from the Reels Editor

To begin, navigate to your Instagram profile and tap the plus icon (+) at the top. Select Reel to enter the Reels editor.
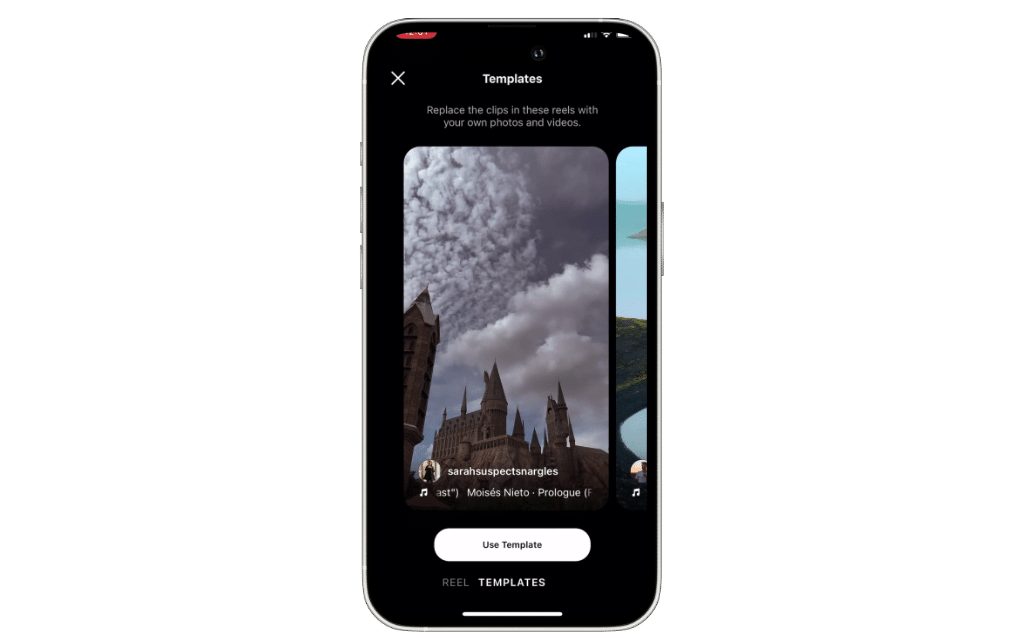
Once you’re in the editor, look at the bottom of the screen where you will find a Templates tab. This tab houses a collection of pre-made templates that Instagram allows you to use.
These templates are created by other creators on the platform and feature specific music and cuts, allowing you to instantly create your own Reels with the same style. -
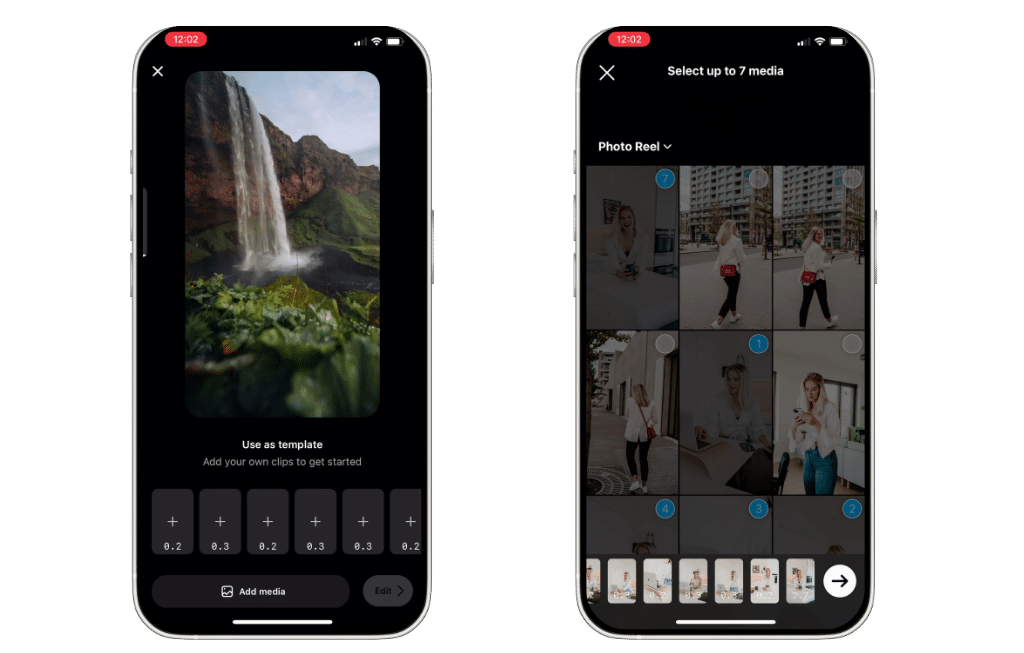
Choosing and Using a Template
Once you’re in the Templates tab, browse through the available options and select one that resonates with your vision for the Reel. After selecting a template, it will prompt you to add your own clips or photos.For instance, you can go to the photo album you’ve created for your Reel and select the images you want to incorporate. You can add multiple images, and the template will automatically integrate them into the Reel, syncing them perfectly with the music and transitions.
-
Editing and Customizing the Template
After adding your photos, the Reel is essentially ready. However, you can make further edits or add customizations. This might include changing some images, adjusting the order, or adding text and other elements to make the Reel more personalized.
The beauty of using templates is that they do most of the heavy lifting in terms of editing and syncing, making the process faster and more convenient. -
Saving Templates for Future Use
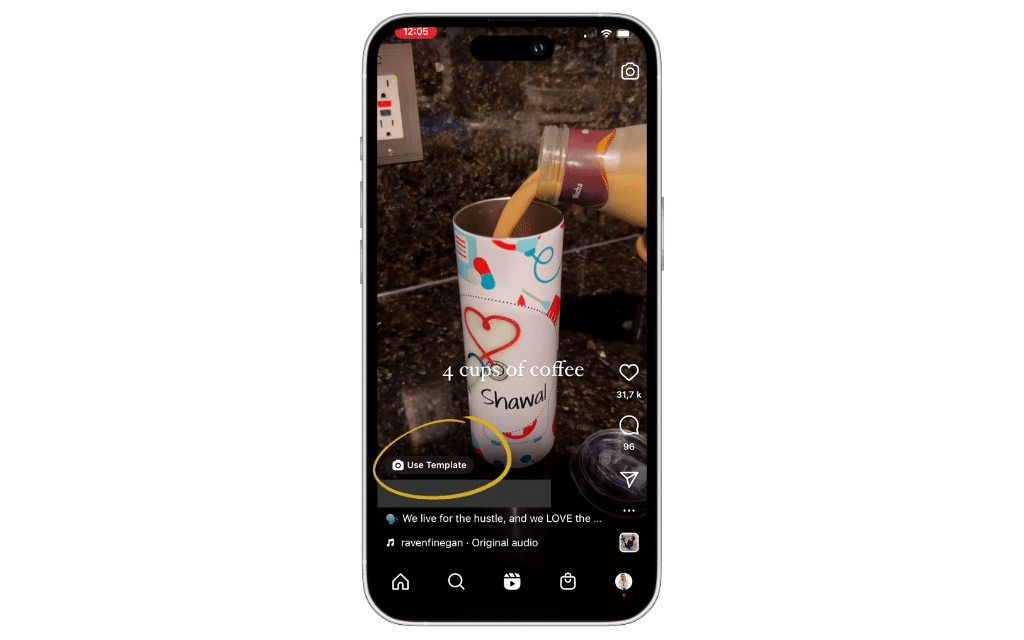
Another way to find templates is more manual but useful when browsing through the Reels feed. As you scroll through Reels, look for ones with the Use Template icon above the username.When you find a preferred template, you can save it for later use by clicking on the save button. This saves the Reel to your collection, then you can access these saved templates later when creating new Reels.
To access your saved templates, go to your profile, click on the three lines, select the saved button, and navigate to the Reels tab. -
Finalizing and Sharing Your Instagram Reel

Once your Reel is complete, review it to ensure it aligns with your desired outcome. If you’re satisfied, you can then proceed to share it. Click Next to add captions, and hashtags, and decide where to share your Reel, like on your feed or stories. Finally, share your creation with your followers and on your profile.
Should You Create Instagram Reels Manually or Using Templates?
Deciding whether to create Instagram Reels manually or using templates depends largely on your personal preferences, the amount of time you have available, and the level of customization you desire.
Manual creation offers a high degree of personalization and control, making it ideal if you have a specific vision for the Reel or enjoy the creative process of editing.
On the other hand, using templates is a time-efficient way to create professional-looking Reels with minimal effort. Templates are perfect if you are new to Reels or lack the time or desire to engage in detailed editing.
Ultimately, the choice between manual creation and using templates should be based on your goals, resources, and comfort level with the Instagram platform. Experimenting with both methods can help you determine which approach best suits your style and needs.
Wrapping Up
Creating Instagram Reels with multiple photos is not just about blending images and music; it’s about storytelling, engaging your audience, and memorably showcasing your brand. Whether you prefer the hands-on approach of the manual technique or the efficiency of using pre-made templates, both methods offer ample opportunities for creativity and expression.
As with any social media skill, practice and experimentation are key to mastering Instagram Reels. By leveraging this feature effectively, you can significantly enhance your presence on the platform, connect with your audience more deeply, and stand out in the vibrant world of Instagram.


